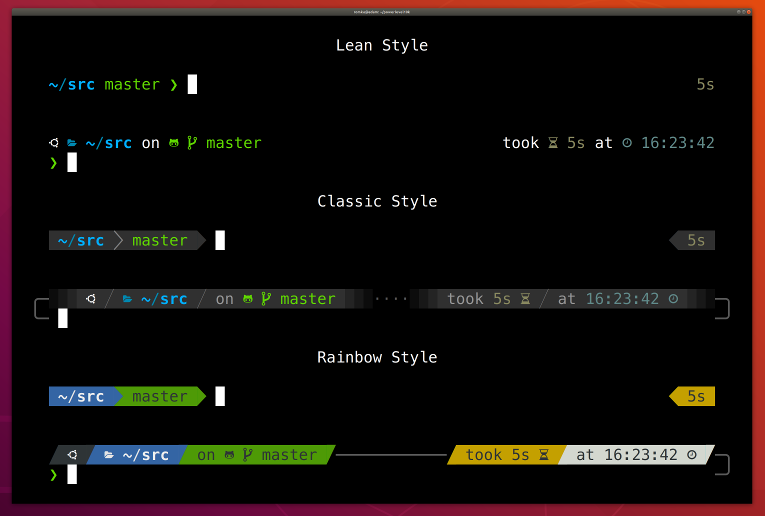
Customizing your terminal shell can greatly improve your productivity and make your workflow more efficient. In this tutorial, we will walk through the steps to set up NeoVim as an IDE, tmux as a terminal multiplexer, and the Z-shell. By the end of this tutorial, you will have a fully configured and customized Linux shell just like this one.
Open terminal window and follow these steps:
To follow through the tutorial you should as privileges to run some commands as super user and if you are using root user don't use sudo.
Install zsh, tmux, neovim, cURL, wget, git in
Start by installing the required packages from apt repository using the following command. (These command may ask for user input while installing.)
sudo apt update && sudo apt upgrade
sudo apt install zsh tmux neovim curl wget git -y
Setup NeoVim as IDE
NeoVim is a community powered open source command line code editor (Similar to VI or VIM). There are many Plugins and themes available to customize it as per your needs. But to start with, we can install NvChad to enhance our NeoVim workflow. It provides blazing fast neovim config providing solid defaults and beautiful UI.
To setup NvChad run the following commands:
Make sure you know how to exit VIM or NeoVim :q!
git clone https://github.com/NvChad/NvChad ~/.config/nvim --depth 1 && nvim

Setup tmux (terminal multiplexer) like a pro
Let's first discuss about what tmux exactly does and what problems it solves...
Have you ever accidently closed a teminal window? Do you use more than one terminal window open all the time and it's very hard to keep them managed? Do you use more than one terminal for same SSH connection? and many more such problems are solved with tmux.
tmux allows you to start many terminals as a session which can be attached. You can split multiple terminal panes and use multiple tabs. It is quite hard to start using, but tmux makes you powerful and productive on command line.
To make tmux more powerful we can use community powered plugins and themes. Use the following commands to setup a cool tmux for you:
git clone https://github.com/gpakosz/.tmux.git

ln -s -f $PWD/.tmux/.tmux.conf ~/.

cp .tmux/.tmux.conf.local ~/.

Install oh my zsh
OhMyZsh is a community powered framework to manage plugins and themes for your favourite Z-shell.
Use the following command to install ohmyzsh and follow the setup process:
sudo sh -c "$(curl -fsSL https://raw.githubusercontent.com/ohmyzsh/ohmyzsh/master/tools/install.sh)"
You can specify the plugins in ~/.zshrc file like the following:
plugins=(
  git
  bundler
  dotenv
  macos
  rake
)
Install nerd and powerline fonts
It is highly recommended toi nstall the required fonts for better user experience.
To install powerline fonts execute the following command:
apt install fonts-powerline
Install nerd fonts using the following commands.
Warning: this download may consume more than 1GB of disk space.
git clone https://github.com/ryanoasis/nerd-fonts.git --depth=1
cd nerd-fonts
./install.sh
Install powerlevel10k
Powerlevel10k is an Z-shell theme. To install and setup it follow these steps:
-
Clone the repository to oh my zsh direcotry:
git clone --depth=1 https://github.com/romkatv/powerlevel10k.git ${ZSH_CUSTOM:-$HOME/.oh-my-zsh/custom}/themes/powerlevel10k
-
Set ZSH_THEME="powerlevel10k/powerlevel10k" in ~/.zshrc.

Install startship (optional)
Starship is a minimal, blazing-fast, and infinitely customizable prompt for any shell!
curl -sS https://starship.rs/install.sh | sh
Run the command for your shell and add to your ~/.zshrc
eval "$(starship init zsh)"
Setup environment variables (optional)
echo source ~/.*.pre-oh-my-zsh >> ~/.zshrc

echo "alias nv=nvim" >> ~/.zshrc
Conclusion
By following the steps outlined in this tutorial, you can easily set up and customize your Linux terminal shell to make it more interactive and productive. Whether you are a beginner or an experienced user, these tools and configurations will help you get the most out of your terminal and improve your workflow.